I was recently booked to capture images for a North East food retailer who have a specialist butchery within their store. In total I had 150 items to capture over a two-day period.
Preparation
First and foremost as with any commission its important to plan and prepare for the shoot ahead.
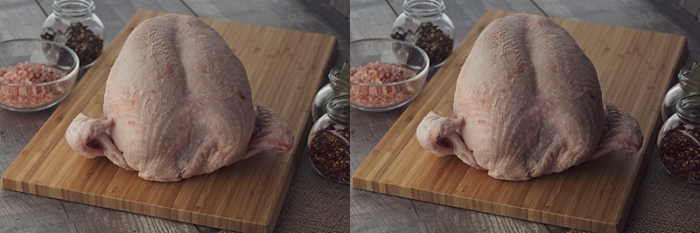
I had an idea on what I wanted the set up to look like, simple, sleek and a slightly modern feel to it. Although the images were to be used for their e-commerce website; I didn’t want them to be plain white background shots. I was shooting Raw Meat products, they needed to look appetising and make the consumer want to buy them.
As with most things when I’m doing research, I turned to google for ideas and inspiration. There was a significant lack of images of this type on google with maybe only two or three available for reference. My idea in my head was still the same before I googled it so that meant I could continue on the same route.
The room I was go shoot in wasn’t the biggest, maybe 2m x 2m in total. There was no natural light, no windows and it was cold. That actually played to my benefit.
Props
As I said above I had a specific look in mind for this shoot, and while I didn’t want to make it really obvious that I’d used props in this shoot, I needed something to help fill the frame for some of the smaller meat items as well as something of texture to shoot on.
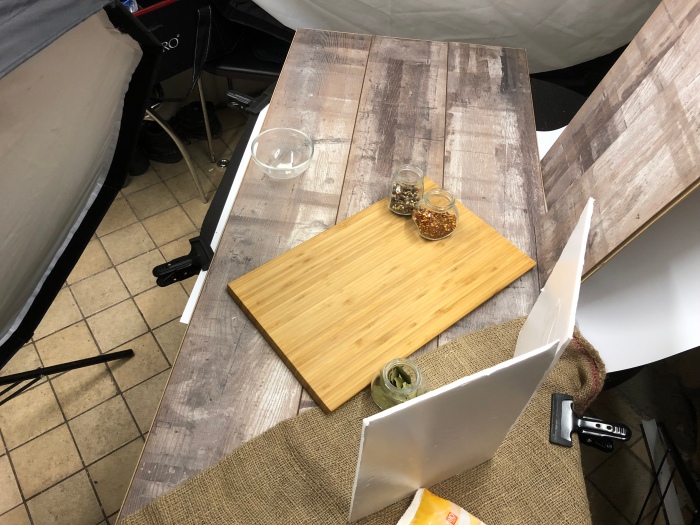
The first and most important part in my mind was a chopping board. It needed to be sealed so that the juice/blood from the meat didn’t immediately seep into it and give a “wet look”. I googled a few different suppliers, looked on Amazon and visited some cooking retailers, none of which had what I wanted.

Ikea.
If Ikea don’t sell it, it ain’t available. I had a quick look on their website and found the perfect board. Small wood grain, sealed, shallow and relatively cheap too. It meant that the pattern wasn’t so strong that it took the eye away from the product on top of it.
I bought quite a few of these to take to the job.

I also purchased small jars with the idea of adding spices, herbs, salt etc to them to help give the impression of a kitchen.
Although I was shooting on a chopping board, I still needed a table or bench. I didn’t want to use a traditional butchers metal countertop as it would have reflected the light too much and taken away from the shot.
I have a few different types of textured laminate flooring that I tend to buy on trips to B&Q. If you can find a split pack with a couple missing its even better as they’ll knock a couple of quid off too.
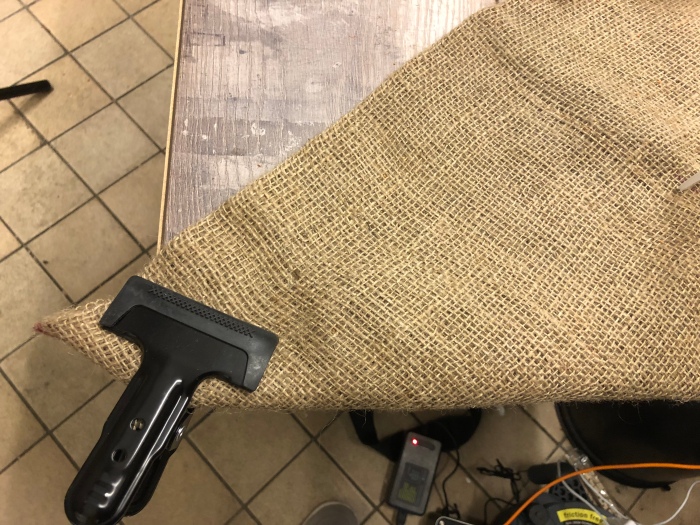
I added the flooring to the frame with the grain running toward the camera rather than away so that the light wasn’t creating shadows on the joints. I also added one of my favourite textures. Hessian. In fact it was a sandbag that cost me £1 from B&Q, it’s barely visible in the frame of the finished shots but helps to break up the background that tiny little bit.
Set Up
With jobs like this it’s always batter to take too much stuff than not take enough as by the time you get set up you may want to change modifiers, add lights and change set ups.
It took me four trips to the car to carry all the equipment in before I realised there was an abundance of flat-bed trolleys that I could have used to carry it in one. Next time.
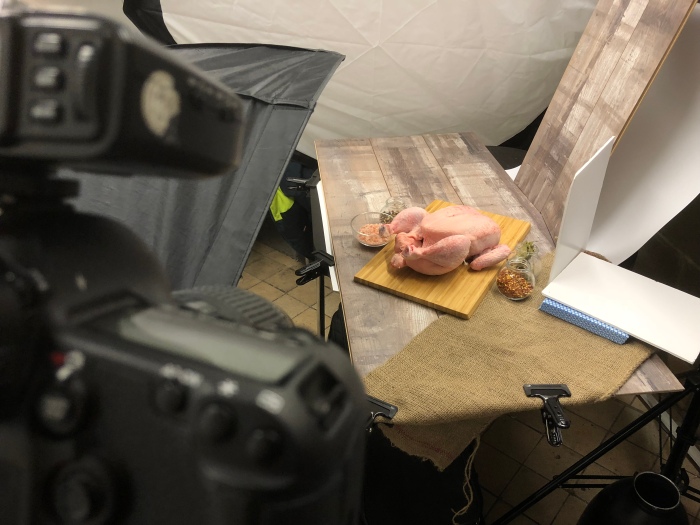
So I started to get the set up in place. Luckily there was a small dining table in the room I was using (I think it was a staff room ) so this was the perfect height to shoot at. I pulled that to one side, set up two stands and a background bar with a white PVC background from Pixapro to use if I needed to bounce a little extra light in.
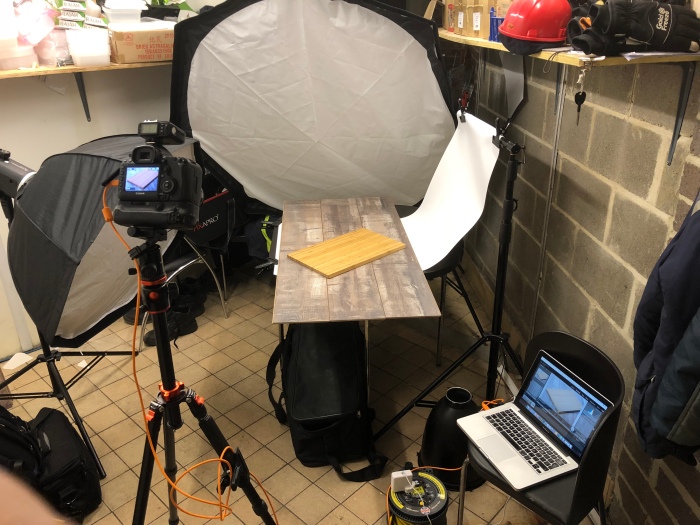
I added the flooring to the table running towards camera, and clamped it to the table to ensure I didn’t knock it while setting up. I clamped the hessian sand bag to one corner and placed the chopping board in the sort of position I wanted it.
Lighting
As I’ve already mentioned, there was no natural light in this room whatsoever, so, I had to create my own window light.
The look I wanted was light and airy as if on the bench next to a large natural light source. This is where the Pixapro 170cm Octabox came in.
Positioned at the end of the table on the opposite side to the camera it was placed on a Pixapro CITI600 strobe, battery-powered which meant I didn’t have to mess about with cables and extension leads.
So with the back light in place, I then needed a fill light. I used another CITI600 with a 90cm Octabox to the camera left, touching the table.
As you can see from the images both of these lights are very close to the product, this was to give the softest light possible. The further away from the product the harsher and deeper the shadows would be and it would look much more obvious that I had used artificial lighting on them.
One of the most important parts of the lighting set up was probably the cheapest too. Foam Board. I used two A4 Foam boards just out of frame on the right of camera to bounce the tiniest bit of light back into the product to lift the shadows ever so slightly. It didn’t need much but it made a huge difference when we had it compared to when we didn’t.
The Shoot
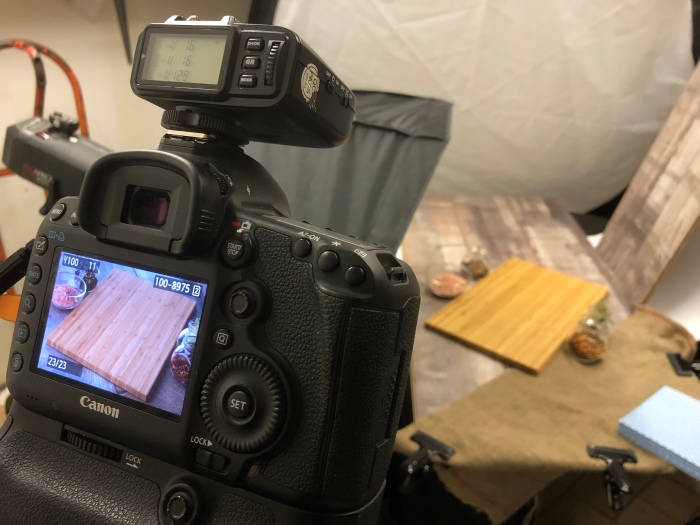
So the scene is set so to speak (that a lot of S’s) and I’m ready for the product to come in. Before it does though there are a couple of aspects I need to ensure. Having already set the light powers (1/16th on the key light and 1/32nd on the fill) I need to give myself the best chance of viewing the images I capture in the most detail. The easiest way to do that is to shoot tethered.
I set up my MacBook with a TetherPro Cable to show the images directly in Lightroom. This meant both the client and I could see the images, I could check for exposure and composition and they could let me know if they like them or if changes are needed.


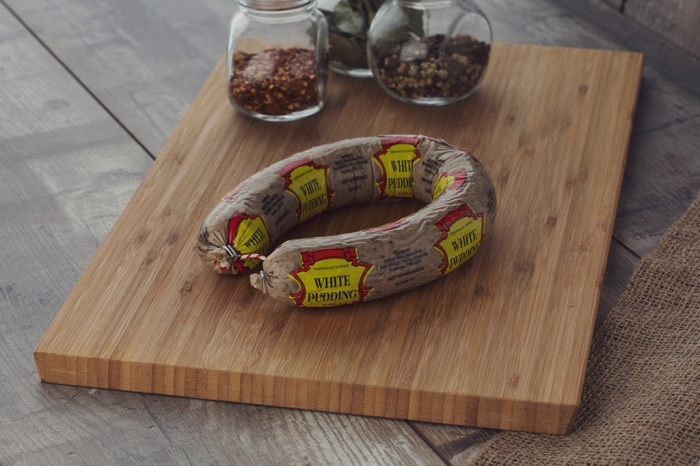
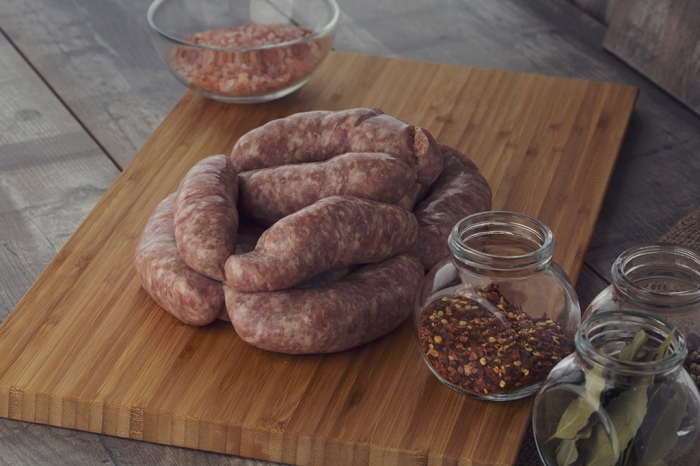
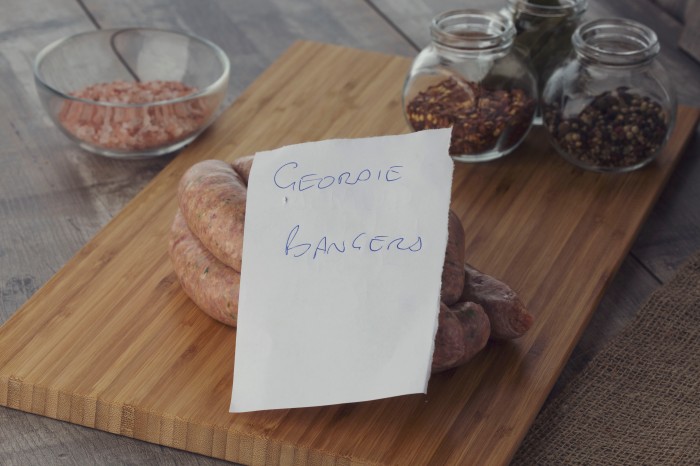
Now some of the items were fairly simple to identify, even some of the more specialist items like chicken feet and pig trotters. But, there were 15 different types of Sausages and a lot of them looked the same. As part of my job, I needed to ensure that these sorts of items were labelled correctly in the metadata to allow the web designer to input them correctly into the website. The easiest way to do that…. a bit of paper of course. Then when it comes to editing I can rename each type appropriately.
It was hard to estimate to the client just how long this shoot would take. It wasn’t just the shooting time but it was also the cleaning down after each product, changing chopping boards, making sure the links of sausages fell in an aesthetically pleasing way. There was a lot to it.
Cleaning definitely took the most time. I would have loved to have used an assistant to help me set up each shot, but there just wasn’t the space to have someone with me. So, I had to set up and place each item of meat product on the set, clean my hands and then capture the images.
“Could you have worn gloves?”
Well yes but I would have had to change between each type of product, and would have still had to take them off to operate the camera. So I found this to be the easiest way. I went through a bumper pack of Kitchen roll within two hours on the first day just drying my hands!
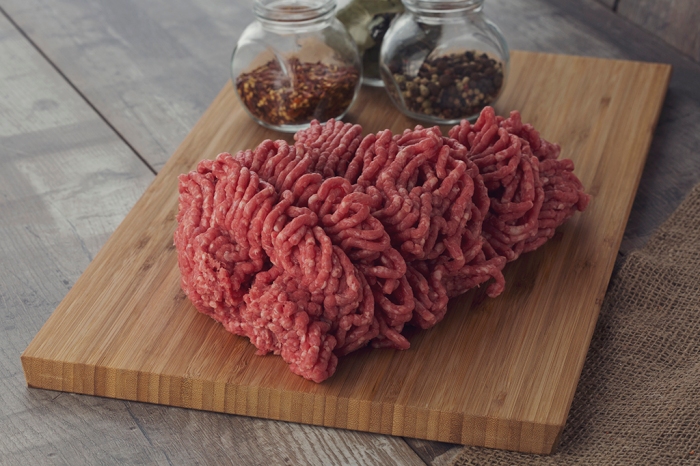
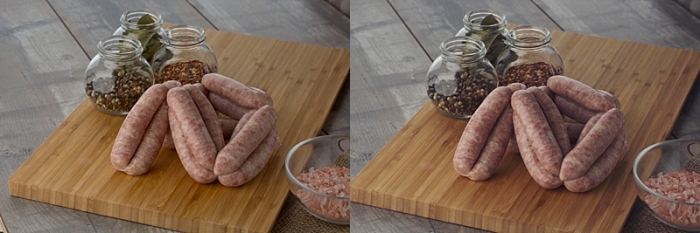
It’s not often I use a Macro lens, but I opted for a 100mm Canon Macro for this shoot. I needed the detail that a lens like this gives you. I was shooting up at F11 (which is alien for someone like me who shoots wide open most of the time) and this allowed me to get a lot of detail into the shots, showing the texture of the meat and give lots of opportunity to crop in when required.
Editing
Getting everything right in camera was essential on a job like this, I wanted minimal work in post. So I had to be very pedantic about drops of blood/juice showing on the board, no matter how small, any residue left behind after adjusting the position of the meat and even the placement of the props around the frame which were changed every couple of items to give a big variation.
With that all in mind the post production was more about adjusting crops to make sure I wasn’t catching the edges of the flooring or foam board and to take out any tiny bits of dust or salt that I spilt.
I used a custom edit to get the finish I wanted to the shot and very slightly desaturate the image, but not so much that it made the meat look too pale.
So all in all this was a challenging but interesting shoot to be a part of. I learnt a lot about Sausage and my Wife now knows how well I can actually clean the kitchen…
In all of the shoots I do, I always look back and think what could I do differently, and with this shoot there probably isn’t a great deal I would change. I’d probably try to use a bigger room as it felt very cramped once the lights and tripod was set up, my standing space was about 2ft x 2ft and I’m a size 12 so that ain’t a lot of room!